· Hakan Çelik · OpenCV / Computational Photography · 3 dk okuma
Image Denoising
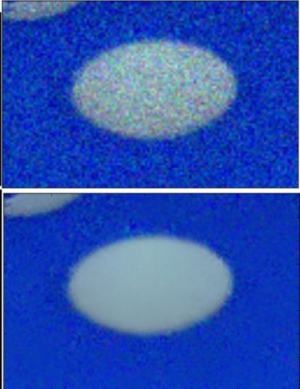
Image Denoising
Goal
- Learn about Non-local Means Denoising algorithm to remove noise in the image
- See different functions like cv.fastNlMeansDenoising(), cv.fastNlMeansDenoisingColored() etc.
Theory
In earlier chapters, we have seen many image smoothing techniques like Gaussian Blurring, Median Blurring etc. In those techniques, we took a small neighbourhood around a pixel and did some operations like gaussian weighted average, median of the values etc. to replace the central element. In short, noise removal at a pixel was local to its neighbourhood.
There is a property of noise. Noise is generally considered to be a random variable with zero mean. Consider a noisy pixel, p = p0 + n where p0 is the true value of pixel and n is the noise in that pixel. You can take large number of same pixels from different images and compute their average. Ideally, you should get p = p0 since mean of noise is zero.
The idea is simple: we need a set of similar images to average out the noise. Consider a small window (say 5x5) in the image. The same patch may be somewhere else in the image. Using these similar patches together and finding their average replaces the pixel with the result. This method is Non-Local Means Denoising. It takes more time compared to blurring techniques, but its result is very good.
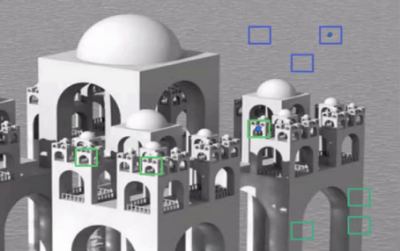
The blue patches in the image look similar. Green patches look similar. For color images, the image is converted to CIELAB colorspace and then L and AB components are denoised separately.
Image Denoising in OpenCV
OpenCV provides four variations of this technique:
- cv.fastNlMeansDenoising() — works with a single grayscale image
- cv.fastNlMeansDenoisingColored() — works with a color image
- cv.fastNlMeansDenoisingMulti() — works with image sequence captured in short period of time (grayscale)
- cv.fastNlMeansDenoisingColoredMulti() — same as above, but for color images
Common arguments:
- h: parameter deciding filter strength. Higher h value removes noise better, but removes details too. (10 is ok)
- hForColorComponents: same as h, but for color images only. (normally same as h)
- templateWindowSize: should be odd. (recommended 7)
- searchWindowSize: should be odd. (recommended 21)
1. cv.fastNlMeansDenoisingColored()
Used to remove noise from color images (Noise is expected to be gaussian):
import numpy as np
import cv2 as cv
from matplotlib import pyplot as plt

img = cv.imread('die.png')

dst = cv.fastNlMeansDenoisingColored(img, None, 10, 10, 7, 21)

plt.subplot(121), plt.imshow(img)
plt.subplot(122), plt.imshow(dst)
plt.show()
Below is a zoomed version of result. The input image has a gaussian noise of sigma=25:
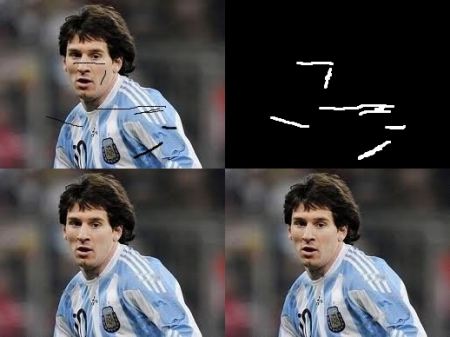
2. cv.fastNlMeansDenoisingMulti()
Now we apply the same method to a video. The first argument is the list of noisy frames. Second argument imgToDenoiseIndex specifies which frame we need to denoise. Third is temporalWindowSize which specifies the number of nearby frames to be used for denoising (should be odd):
import numpy as np
import cv2 as cv
from matplotlib import pyplot as plt

cap = cv.VideoCapture('vtest.avi')

# create a list of first 5 frames
img = [cap.read()[1] for i in range(5)]

# convert all to grayscale
gray = [cv.cvtColor(i, cv.COLOR_BGR2GRAY) for i in img]

# convert all to float64
gray = [np.float64(i) for i in gray]

# create a noise of variance 25
noise = np.random.randn(*gray[1].shape) * 10

# Add this noise to images
noisy = [i + noise for i in gray]

# Convert back to uint8
noisy = [np.uint8(np.clip(i, 0, 255)) for i in noisy]

# Denoise 3rd frame considering all the 5 frames
dst = cv.fastNlMeansDenoisingMulti(noisy, 2, 5, None, 4, 7, 35)

plt.subplot(131), plt.imshow(gray[2], 'gray')
plt.subplot(132), plt.imshow(noisy[2], 'gray')
plt.subplot(133), plt.imshow(dst, 'gray')
plt.show()
Below image shows a zoomed version of the result:
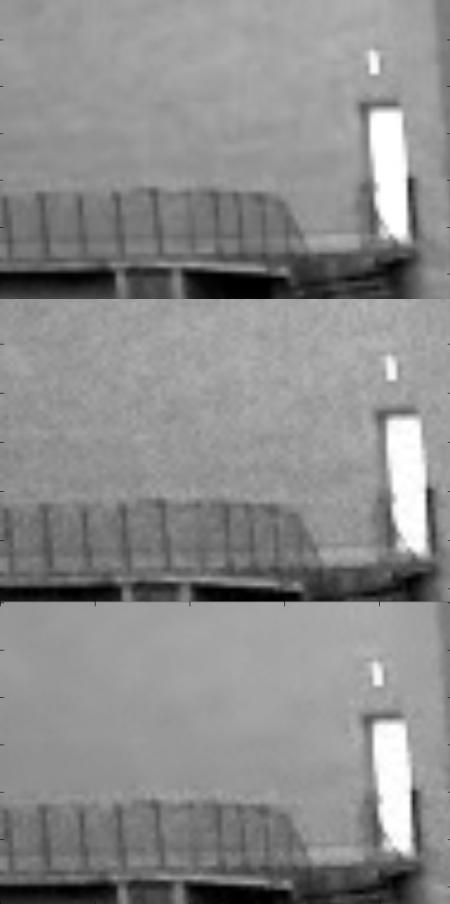
It takes considerable amount of time for computation. In the result, first image is the original frame, second is the noisy one, third is the denoised image.